Friday, December 18, 2015

CARD CLASSES - December 17, 2015


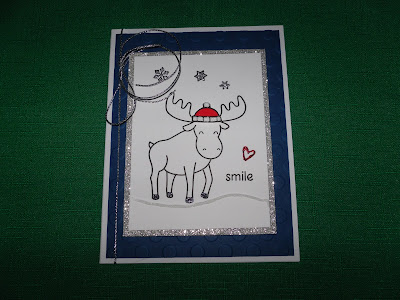
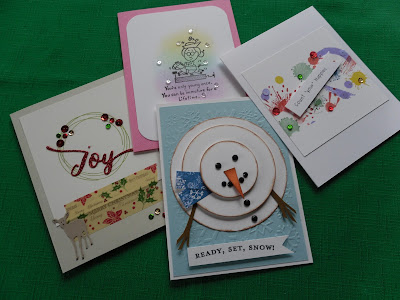
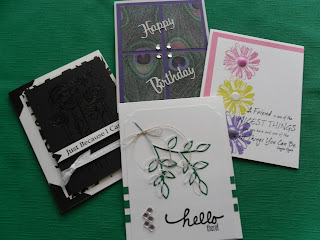
The week of December 13th, we had a wonderful, beautiful snow which caused me to cancel the two card classes which were to be held on Dec. 15, 2015.  The gals were awesome and all were able to reschedule to Thursday, Dec. 17 with the exception of one.  So, I had six students for the AM Class and 5 for the PM Class.  

The card in the lower left (Birthday Fishes) is a sneak peak of a new release by Two Paper Divas.  What is hidden behind the tied off doors is so cute.  Stay tuned to my BLOG for the reveal in early January, 2016.  

MERRY CHRISTMAS to ALL of my Card Making Friends.  May your Holidays be just the best!!!

Sunday, December 13, 2015

TWO PAPER DIVAS Design Team Card - A String of Valentines!


I could not resist doing another card with one of the December release TWO PAPER DIVAS's stamp sets.  Love this one Melissa and Gayla.  Soooooo sweet!!!

I backed the "happy" die (from W Plus 9) with the Red Foil paper from Stampin'Up.  Then using the piece from the die cut, I offset it on the card.

STAMPS:   Two Paper Divas - "String of Hearts" & "Simple Phrases"

CARDSTOCK & PAPER:  Bazzill - Marshmallow &  "Love Letters" from Gina K. Designs

Enjoy your Holidays!!!    

Thursday, December 10, 2015

TWO PAPER DIVAS Design Team Card - Valentine Tag on a Card


I am so in love with doing any kind of Shaker Cards and I decided to make a small one this time. Tags are so cute when they are attached to a card.  Simple and Sweet .... that is this card!!

STAMPS:  Two Paper Divas -  Heart Blocks & Large Conversation Heart  (December 2015 Release)

DIE:  Avery Elle - Pinked Die

TAG:  Creative Tags by Recollections

DESIGNER PAPER:  Love Letters by Gina K. Designs

Well now it is time to get back to working on Christmas cards.

Happy Card Making!!!


Sunday, December 6, 2015

TWO PAPER DIVAS Design Team Card - Bubble Gum Day!!


Love, Love, Love the "New" Two Paper Divas December stamp release which just came out on Saturday (5th).  I have used two sets of this release on this card.  You can see below which sets. Although I do not chew gum anymore (???), do you not remember as a child how fun these machines were!!!!  Saved those pennies or was it a nickel??

STAMPS:  Two Paper Divas -  "I Chews You" set and the single word on the layered
paper from the set "Large Conversation Heart".                  

PAPER:  Bazzill - Easter Green;  Essentials by Ellen - Woodgrain Embossed White Cardstock; 110   lb. wt. Neenah Solar White for the top layer.

RIBBON:  Hug Snug White Seam Binding.

Wink of Stella - Clear

INK:   Memento:  Grape Jelly, Bahama Blue, Lilac Posies and Bamboo Leaves.

For the ribbon, I used 4 different clean pencil erasers and stamped them into the 4 inks and then stamped it on the seam binding.  Just like in all design, repeating the ink color on the ribbon, gum balls and the word "Sweet" on the background, it will give the continuity needed on the card.

Happy Stamping!!!

Saturday, November 28, 2015

TWO PAPER DIVAS Design Team Card - Blowing Wishes


Just a little tired of doing our Christmas Cards and some for my Card Classes ..... I decided I would take a break and go after this cute set of stamps from TWO PAPER DIVAS.  I saw a concept of this several years ago and then forgot about it.  Don't you just love those memories!!  They do return when you least expect them to.

STAMPS:         Two Paper Divas - Dandelion Wishes Set

I need to send a card of support to a friend and I was glad that I thought about this.

Happy Card Making to each of you!!

Friday, November 20, 2015

TWO PAPER DIVAS Design Team Card - Happy New Year


Well I could not stop myself from "thinking ahead"!!  Part of the wonderful set from TWO PAPER DIVAS is represented by the Sentiment and the two champagne glasses.  Before we know it .... it will be time for the New Year!!!

First I used a star stencil and Metallic Gold Embossing Paste by Wendy Vecchi.  This was applied to a piece of 110 lb. wt. Neenah Solar White Card stock.  I made a pocket with Vellum.  I embossed in white Hero Arts Embossing Powder the Champagne Glasses.  Using score tape I built the pocket and decorated it with the red glitter tape.

Will be back to finish this writing!!  

Sunday, November 15, 2015

TWO PAPER DIVAS Design Team Card - The "Sentiment" is the star of the card!


Have you ever seen a Sentiment and know exactly who you want to send it to?  This Sentiment just spoke to me about my friend, Hope.  Words of  "encouragement" are so important at certain times of our lives.  TWO PAPER DIVAS has created collectively a wonderful set of stamps in their new November, 2015 set called "Everyday Sentiments #3" for just an occasion.  You will find something you need in your group of Sentiments from this set ...... if not ALL of them!!

I created this envelope on the front using my Stampin' Up Envelope Punch Board and the size I chose was the 2-1/2 x 3 to be able to fit the front of this 4-1/4 x 5-1/2 card.  Follow the directions on the Punch Board to complete this envelope.  Even though I made my card as a standard side opening so I could write on the inside of the base, I chose also to make a small, 2-1/2 x 2-3/4, piece to insert and could be pulled out after the twine was untied.  I also punched a heart from the scrap piece from making my envelope so I could place it as you see and eventually add a special couple of words!!!

Once I tied the twine, I used score tape to attach it to my card.  I think any other type of adhesive might pull apart with multiple openings by the recipient.

STAMP:  Two Paper Divas set as stated above
CARD STOCK:  Simon Says - Ivory IV29;  Gina K Designs - Ocean Mist;  Kaiser Craft 6-1/2" Paper Pad called "75 Cents"
Basic thin Roll of Twine - doubled
Teal colored Sequins

HAPPY CARD MAKING with a different touch!!!


Saturday, November 14, 2015

TWO PAPER DIVAS Design Team Card - The Bottom Line


I have a wonderful friend who is in her early stage of dealing with Cancer and I have been trying to make some cards to let her know that I am there for her ....... whatever she needs!!  I remembered that I had not used this really sweet set from TWO PAPER DIVAS.  The card is pretty simple but I hope that she will laugh ...... and that is my purpose!!

TWO PAPER DIVAS Stamp Set:  His and Hers Clothesline Accessories
CARDSTOCK:   Candy Hearts through Ellen Hutson and Neenah Solar White 110lb.
PAPER PIECING:  The panties - Echo Park Paper Co. - Dots & Stripes
ASSORTED SELECTION -  Various sizes of sequins
EMBOSSING FOLDER:  Cuttlebug by Provo Craft
INSIDE:  Stampin' Up Large Die

To my sweet friend ..... Hope ..... please put her in your prayers!!

TWO PAPER DIVAS Design Team Card - House Window Card


Now that we have had our first snow fall for Winter of 2015 (it is actually before Thanksgiving), I thought I would pull out this darling house in my collection of Two Paper Divas stamp sets.

The first time that I used the die plate, I thought it would be cute sometime to leave it whole instead of what I have done in the past by die cutting it enough to remove the card stock to reveal the "Holy" snowflake die.  It almost looks like a puzzle but it makes a fun background in a different way.

TWO PAPER DIVAS Stamp Sets:      My Neighborhood and Warm Winter Wishes
CARD STOCK:   Neenah Solar White  - 110 lb and Gumball (Blue) from Ellen Hutson
INK:  Bashful Blue - Stampin' Up and Versafine Black
DIES:  Impression Obsession DIE211-YY (Background) and MFT-605 Stitched Square Frames
PUNCHES:  Stampin' Up (Small snowflake and Greeting)
RIBBON:  French Blue Grosgrain - Stampin' Up

I did a double window plastic to trap the seed beads.  By doing this I had to use the foam tape to sandwich the window plastic.  I also did not put as much seed beads as I normally would.  It just gives the illusion of snow falling.

I am always trying to find new ways to make shaker cards.  ENJOY!!!

Thursday, November 12, 2015

TUESDAY CARD CLASSES - Some recent Cards


I selected some of these cards from the last couple of weeks of cards which I taught.  The upper left one is a spinner card which is created with Gina K Designs stamp sets "Triple Play Frame" and "Triple Play Holiday".  I used the Liquid Applique' on the Cupcakes.  On the Tree in the next card, I used the Snow Marker to make the droplets of snow.  The center bottom card is a pocket card which is pulled out at the top.

TWO PAPER DIVAS Design Team Card - A Flower a Day in the Watering Can


I have been forgetting to add this card to my Blog since these stamps were released from TWO PAPER DIVAS.  My students made this card actually before the stamps (the can with he flowers and the sentiment) were released.

TWO PAPER DIVAS:  Stamps are Bloom Wildly and Bloom Wildly Sentiments

Background paper came from a book of 12 x 12 paper

Wink of Stella - clear on the flowers and the spout of the Watering Can

Twine:  I did not have any black twine, so I colored natural tan with a black Copic

I Embossed the Sentiment with Versamark and used clear embossing powder.  These stamps are really pretty special.  

Monday, November 9, 2015

ONLINE CARD CLASS - HOLIDAY STYLE - 11/9/15


Today I started another ONLINE CARD CLASS - Titled Holiday Style!!  I have been taking these card classes for quite some time.  They are taught by some delightful ladies who become like friends while taking these classes!!  What is nice about these classes is you use the stamps you own to create the concepts that are taught.  Julie Ebersole did a darling grouping of trees at the bottom of her card with a variation of some colors.  It is hard to see the slight color change that I did on my card.  Then using a Glue Pad I stamped "tiny" snow flakes all over my card and then sprinkled Prisma Glitter on it.  What a glistening was created.

One of the other ladies, Laurie Willison, did a special card in her video today about using the "rule of thirds" when creating a card.  I did a variation of that by stamping the trees and then the Santa riding off to the moon.

These card classes I so look forward to and if you want to learn some terrific techniques, do yourself a favor and sign up on Online Card Classes.com.  Besides this class, Holiday Style, there are many others to choose from that can be started at anytime......they are forever classes!!!  Great for going back to refer to a specific card or technique!!  Enjoy!!!

Sunday, October 25, 2015

TWO PAPER DIVAS Design Team Card - PEACE SNOWMAN


Love this new snowman stamp ....... thanks to Two Paper Divas!!  This chunky glitter is awesome as a background.  I stamped on watercolor paper with Versafine black ink and then embossed with the "clear" embossing powder.  Using my Tombow watercolor pens ..... the snowman got his personality.
My clear Wink of Stella pen gave it all its final touch.  Happy Card Making!!!

OCTOBER, 2015 TUESDAY WITH CARRYN CARD CLASSES


Saturday, October 17, 2015

TWO PAPER DIVAS DESIGN TEAM CARD - Just hangin around!


What a darling set of stamps from Two Paper Divas.  This one can be found on their website and under the clear stamps titled "Branching Out".  I love Birdies and so do my weekly students.  This set has 11 stamps to choose to make a very fun creation.  This is the funniest little "fat bird" - thanks Mel and Gayla!!

All the goodies in the picture kinda tells the story of product which I used, beyond the mentioned TPD stamps.  The little container of sequins came from who knows where.  BUT, I have 72 of those filled with sequins and stones and they are all held in one flat container with a secure top and that is my favorite purchase this summer!!!  I found it on Amazon.  Ask me if I need another one ..... you betcha!!!

Hope that you have fun with this cute stamp set!!!

TWO PAPER DIVAS DESIGN TEAM CARD - Mts. and Birdies all lined up


I will be back to do this write up!!!   Trying to finish up cards for 12 students on Tuesday!!  Okay ... I am back.  It is Sunday morning and it is cloudy and off and on rainy.  I cannot see our beautiful Mountains out our kitchen window (or any window on the front of the house for that matter).  So,  I at least can enjoy the Mts. which are on this card.

Being a Designer for TWO PAPER DIVAS I always like to dig in my "stash" of wonderful stamps by these two creative genius of TPD (Gayla and Melissa).  This card is no exception ..... the Mts. were created several years ago because of my students living among these gorgeous San Juans and they needed a Mt. stamp.  So as they say .... "wallah" !!  Melissa, Gayla and Rene (Melissa's trusty Manager of her paper crafting store at the time in Kansas City) along with the "Road Trip Gals" from Kansas were out here in our beautiful Pagosa Springs, CO and were doing a RETREAT for our Crafty Gals here when the idea of the Mts. became necessary.  Lots of memories and so much fun.

Okay, I am finished reminiscing ....... here are the three stamps sets which are used for this simple card:

TWO PAPER DIVAS:  Christmas Clothesline; Wanna Hang Out & Mountains

StampinUp:  The punch - have always loved this punch!

Now it is time for me to eat breakfast and get dressed and start my day of finishing up THE cards for Tuesday's classes.  Have a great rest of your weekend!!!
     

Monday, September 14, 2015

CURRENT CARDS TAUGHT IN MY WEEKLY CLASSES - AUG & SEPT 2015


The snowman in the second group I have wanted to make since I first saw it on Pinterest some time ago.  I knew one day I would make it once I purchased the series of circle dies.  What a cute idea and the gals seemed to enjoy making it.  

The gals also have made the cards which I recently have posted individually for TWO PAPER DIVAS.  

Probably the Chubby Chums in the two cards in the first grouping are some of my favorite stamps with dies which I have purchased in a while.  

See you next time!!!  Going to be really busy for a couple of weeks!!!      Will be back to tell you why ...

Saturday, September 5, 2015

TWO PAPER DIVAS DESIGN TEAM CARD - Finger painted Pumpkins


I recently saw a precious pumpkin card that my favorite online person, Julie Ebersole,  had created and I just had to make my version.  These pumpkins are actually finger painted which I saw Jennifer McGuire do on a current card.  So, using these techniques from these two fabulous ladies ..... here is my concept using TWO PAPER DIVAS STAMPS.

I used a sheet of the Distress Watercolor Cardstock on the more textured side and taped down (using Post It tape) the tiny star stencil.  I really could have used any 110 lb white cardstock but I wanted this texture in the background.  Then using a palette knife I spread on the Wendy Vecchi Black Embossing Paste by Dreamweaver in a very thin coat (so it would dry quicker).  I did not want to heat set it because the heat can change the look of the paste.....air drying is better!  By the time I finished the pumpkins, the stars were dry because of the thin coat.  If you are using a larger star version, it definitely would take longer.  Once dry, I cut down the cardstock to 4" x 5-1/4".  I added the Washi Tape and the cute Trick or Treat Ribbon (use score tape on the ribbon) and wrapped them to the back of the Distress Cardstock.

So, as I said above, while the stars were drying, I took some Gina K. Designs 120 lb. Heavy base weight pure white cardstock, it is really smooth,  I stamped all three - TPD two pumpkins & one leaf, with Versafine Black Pigment Ink.  While it is still wet, I sprinkled Simon Says Stamp Fine Detail "Clear" Embossing Powder on these three and heatset.  The Clear adds such a glistening in person.  Once dry and set up ....... then the fun begins!!!  I worked on my craft sheet and taking my right index finger , opposite my fingernail - not my tip, rubbed over these beautiful Avery Elle Pigment Inks (Mimosa, Fizz, & Papaya) on the pumpkins.  One color at a time and wiping off my finger in between the colors. Then I did the same with the Greens (Lemon Grass & Celery) on the stems and also on the leaf but this time I used a Q-Tip to apply.  Do this fairly quickly and then add the Clear Embossing Powder and heat set it.   Because I applied the lightest color (Mimosa) on the pumpkins first, what occurred is the Clear Embossing Powder stuck more to the darker section of the pumpkins and it just came out perfectly.  I am not sure if you really can see in the picture but the card is stunning with this look on the pumpkins.  As long as you have color behind the Clean Emb. Powder, the result is the best!!

Before adding the pumpkins and the leaf to the stars, I cut slightly smaller than the Distress Cardstock a piece of White Foam Sheet and applied it to the back of the Distress Cardstock.  This works perfectly to overall add the dimension to the card.  I fussy cut the pumpkins and the leaf and popped them up on the card but before I nestled some Sulky Gold Metallic Thread behind the pumpkins.  I purchased the Thread in the sewing section of Jo Ann's.

Lots of Texture and a pretty sweet card thanks to the talents and creativeness of Julie Ebersole and Jennifer McGuire and of course ME and combining their looks.  Thanks Ladies!!!

TWO PAPER DIVAS Stamp Set:   "Fall is in the Air          

Saturday, August 29, 2015

TWO PAPER DIVAS Design Team Card - Halloween Harvest


I will be back to do my write up when I return to Pagosa ......  Back from Denver and the trip was successful for my friend, Bonnie, at the Merchandise Mart.  The Buying for her Store, Colorado Christmas Shoppe, went well but we have been to better shows in the past.  Next "shopping spree" may be in Las Vegas in 2016.

My featured card started because of the 12 x 12 paper seen in the background.  Way toooo fun to use for the backdrop of this card.  I embossed the Sentiment, Bat, Crow and Fence with clear embossing powder.  The Set is from TWO PAPER DIVAS .... a new one!!!

Enjoy .......

TWO PAPER DIVAS Design Team Card - Circle Stamp


Okay ..... hurrah for me .... I was able to put my newer Watermark on my card!!  But, I am still working in the old system.  Maybe next week I will be closer to working totally in the New Computer System.

I will be back to do all my write ups for the past few weeks but I have to get myself ready to go to Denver at 6:00 in the morning (6:00 AM) Yikes!!!  Going to the Denver Merchandise Market with my friend, Bonnie.  We are going to check out some product for her Christmas Store here in Pagosa. After doing that tomorrow, we will go stay with my kids!!  Time for Granddaughter time (3) for just a short while.   Later .....

Okay, I am back!!  Love the new "circle" stamp set from TWO PAPER DIVAS called "Silhouette Circles" located in the category "Sentiments" in their online store.  What a fun set to use in so many different ways.  As you can see from the above card, I took scrap pieces of white cardstock and embossed them in three different folders.

Short and sweet report because it is pretty obvious what I did.  Enjoy your Card Making!!!
Sunday, August 9, 2015

TWO PAPER DIVAS Design Team Card - Halloween 2015


Yes, ladies it will soon be time to WHOOP IT UP with candy and scary things we like to drag out of our storage areas in the home.  This actually is my husband's favorite time of the year!!  For years I have made "real" egg ornaments and have two different trees (Christmas and Easter) but I always wanted to do a Halloween tree and my daughter has begged me to make her eggs for her trees and to also do a Halloween one.  But neither of us have bought the cute things to go in my eggs for this crazy, spooky time of the year.  If I ever do .... I will post it (the tree) for you to see.

Okay ..... gotta go finish cards for my next classes this coming Tuesday.  Then I will be back to finish this information and also one which I need to finish further down on this list!!  See ya later ......

Here I am finally .....  My weeks just "roll by" with teaching classes and then prepping for those classes.  I spend a lot of time on the computer and go back to school myself online in this wonderful Card Making Industry.  One of these days I will post all the symbols of ALL of the Online Card Classes I have taken over the years..... Love, Love, Love all of them!!

My Two Paper Divas card this week is composed of the following stamp sets:

  • Creepy Crawly Halloween
  • Wicked Wear Accessories
  • Large Mason Jar Toppers
  • Mason Jars
I used silver cardstock for the Jar Lid to make it stand out on the card and looking like a metal lid.  Goggle Eyes on the Owl just completed the card!

Happy Halloween to ALL ........BOO!!!

P. S.  While I was in Denver last weekend, I looked in Michael's and they do not have any tiny things that I liked to put in my egg ornaments.  So, I think I need to resort to checking out something online. Maybe next year I can have a Spooky Tree!!   
  

Thursday, August 6, 2015

VARIOUS PICTURES OF CARDS FROM MY CLASSES


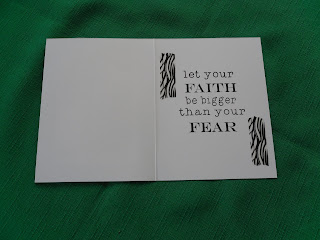
The following are some of the pictures of cards which I taught in CLASSES during 2015 & some during 2014!!