Sunday, October 25, 2015

TWO PAPER DIVAS Design Team Card - PEACE SNOWMAN


Love this new snowman stamp ....... thanks to Two Paper Divas!!  This chunky glitter is awesome as a background.  I stamped on watercolor paper with Versafine black ink and then embossed with the "clear" embossing powder.  Using my Tombow watercolor pens ..... the snowman got his personality.
My clear Wink of Stella pen gave it all its final touch.  Happy Card Making!!!

OCTOBER, 2015 TUESDAY WITH CARRYN CARD CLASSES


Saturday, October 17, 2015

TWO PAPER DIVAS DESIGN TEAM CARD - Just hangin around!


What a darling set of stamps from Two Paper Divas.  This one can be found on their website and under the clear stamps titled "Branching Out".  I love Birdies and so do my weekly students.  This set has 11 stamps to choose to make a very fun creation.  This is the funniest little "fat bird" - thanks Mel and Gayla!!

All the goodies in the picture kinda tells the story of product which I used, beyond the mentioned TPD stamps.  The little container of sequins came from who knows where.  BUT, I have 72 of those filled with sequins and stones and they are all held in one flat container with a secure top and that is my favorite purchase this summer!!!  I found it on Amazon.  Ask me if I need another one ..... you betcha!!!

Hope that you have fun with this cute stamp set!!!

TWO PAPER DIVAS DESIGN TEAM CARD - Mts. and Birdies all lined up


I will be back to do this write up!!!   Trying to finish up cards for 12 students on Tuesday!!  Okay ... I am back.  It is Sunday morning and it is cloudy and off and on rainy.  I cannot see our beautiful Mountains out our kitchen window (or any window on the front of the house for that matter).  So,  I at least can enjoy the Mts. which are on this card.

Being a Designer for TWO PAPER DIVAS I always like to dig in my "stash" of wonderful stamps by these two creative genius of TPD (Gayla and Melissa).  This card is no exception ..... the Mts. were created several years ago because of my students living among these gorgeous San Juans and they needed a Mt. stamp.  So as they say .... "wallah" !!  Melissa, Gayla and Rene (Melissa's trusty Manager of her paper crafting store at the time in Kansas City) along with the "Road Trip Gals" from Kansas were out here in our beautiful Pagosa Springs, CO and were doing a RETREAT for our Crafty Gals here when the idea of the Mts. became necessary.  Lots of memories and so much fun.

Okay, I am finished reminiscing ....... here are the three stamps sets which are used for this simple card:

TWO PAPER DIVAS:  Christmas Clothesline; Wanna Hang Out & Mountains

StampinUp:  The punch - have always loved this punch!

Now it is time for me to eat breakfast and get dressed and start my day of finishing up THE cards for Tuesday's classes.  Have a great rest of your weekend!!!
     

Monday, September 14, 2015

CURRENT CARDS TAUGHT IN MY WEEKLY CLASSES - AUG & SEPT 2015


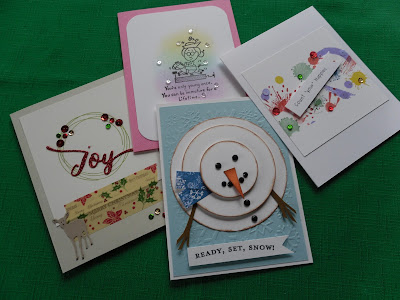
The snowman in the second group I have wanted to make since I first saw it on Pinterest some time ago.  I knew one day I would make it once I purchased the series of circle dies.  What a cute idea and the gals seemed to enjoy making it.  

The gals also have made the cards which I recently have posted individually for TWO PAPER DIVAS.  

Probably the Chubby Chums in the two cards in the first grouping are some of my favorite stamps with dies which I have purchased in a while.  

See you next time!!!  Going to be really busy for a couple of weeks!!!      Will be back to tell you why ...

Saturday, September 5, 2015

TWO PAPER DIVAS DESIGN TEAM CARD - Finger painted Pumpkins


I recently saw a precious pumpkin card that my favorite online person, Julie Ebersole,  had created and I just had to make my version.  These pumpkins are actually finger painted which I saw Jennifer McGuire do on a current card.  So, using these techniques from these two fabulous ladies ..... here is my concept using TWO PAPER DIVAS STAMPS.

I used a sheet of the Distress Watercolor Cardstock on the more textured side and taped down (using Post It tape) the tiny star stencil.  I really could have used any 110 lb white cardstock but I wanted this texture in the background.  Then using a palette knife I spread on the Wendy Vecchi Black Embossing Paste by Dreamweaver in a very thin coat (so it would dry quicker).  I did not want to heat set it because the heat can change the look of the paste.....air drying is better!  By the time I finished the pumpkins, the stars were dry because of the thin coat.  If you are using a larger star version, it definitely would take longer.  Once dry, I cut down the cardstock to 4" x 5-1/4".  I added the Washi Tape and the cute Trick or Treat Ribbon (use score tape on the ribbon) and wrapped them to the back of the Distress Cardstock.

So, as I said above, while the stars were drying, I took some Gina K. Designs 120 lb. Heavy base weight pure white cardstock, it is really smooth,  I stamped all three - TPD two pumpkins & one leaf, with Versafine Black Pigment Ink.  While it is still wet, I sprinkled Simon Says Stamp Fine Detail "Clear" Embossing Powder on these three and heatset.  The Clear adds such a glistening in person.  Once dry and set up ....... then the fun begins!!!  I worked on my craft sheet and taking my right index finger , opposite my fingernail - not my tip, rubbed over these beautiful Avery Elle Pigment Inks (Mimosa, Fizz, & Papaya) on the pumpkins.  One color at a time and wiping off my finger in between the colors. Then I did the same with the Greens (Lemon Grass & Celery) on the stems and also on the leaf but this time I used a Q-Tip to apply.  Do this fairly quickly and then add the Clear Embossing Powder and heat set it.   Because I applied the lightest color (Mimosa) on the pumpkins first, what occurred is the Clear Embossing Powder stuck more to the darker section of the pumpkins and it just came out perfectly.  I am not sure if you really can see in the picture but the card is stunning with this look on the pumpkins.  As long as you have color behind the Clean Emb. Powder, the result is the best!!

Before adding the pumpkins and the leaf to the stars, I cut slightly smaller than the Distress Cardstock a piece of White Foam Sheet and applied it to the back of the Distress Cardstock.  This works perfectly to overall add the dimension to the card.  I fussy cut the pumpkins and the leaf and popped them up on the card but before I nestled some Sulky Gold Metallic Thread behind the pumpkins.  I purchased the Thread in the sewing section of Jo Ann's.

Lots of Texture and a pretty sweet card thanks to the talents and creativeness of Julie Ebersole and Jennifer McGuire and of course ME and combining their looks.  Thanks Ladies!!!

TWO PAPER DIVAS Stamp Set:   "Fall is in the Air          

Saturday, August 29, 2015

TWO PAPER DIVAS Design Team Card - Halloween Harvest


I will be back to do my write up when I return to Pagosa ......  Back from Denver and the trip was successful for my friend, Bonnie, at the Merchandise Mart.  The Buying for her Store, Colorado Christmas Shoppe, went well but we have been to better shows in the past.  Next "shopping spree" may be in Las Vegas in 2016.

My featured card started because of the 12 x 12 paper seen in the background.  Way toooo fun to use for the backdrop of this card.  I embossed the Sentiment, Bat, Crow and Fence with clear embossing powder.  The Set is from TWO PAPER DIVAS .... a new one!!!

Enjoy .......